3. Integrated Development Environment
Creating a Project
Do not start Blend for Visual Studio, it is a different program. It looks very much like Visual Studio, which can confuse some beginners.
Start your IDE (Visual Studio 2010/2017 or Code::Blocks). If you are using another IDE, the steps may be slightly different, but they are usually similar in all IDEs
The project is a unit for managing the files containing the source code of your program, and other files, and for managing settings for compiling your program.
If you are using Code::Blocks IDE instead of Visual Studio, after selecting File –> New -> Project, be sure to select Console application. You must choose the name of the project and the project’s directory. Leave all other settings unchanged and proceed to create the project.
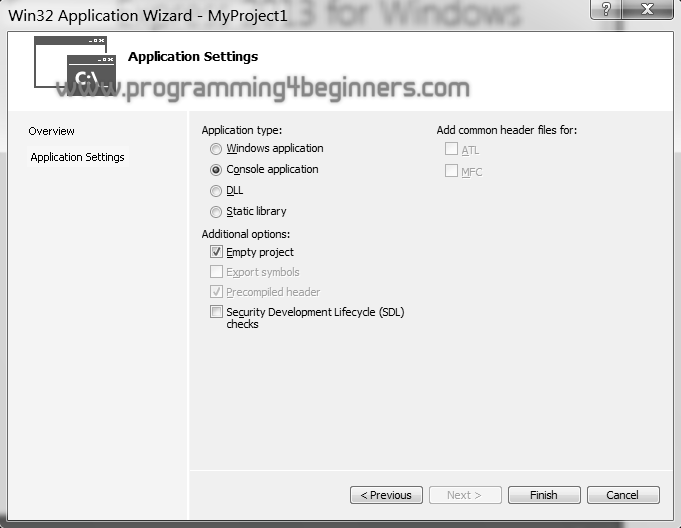
To create a new project, from the menu select File –> New Project. Then, as shown on the image below, select the Win32 Console Application (it is of Visual C++ type), enter the name of the project, for example MyProject1, and we suggest unchecking the Create directory for solution checkbox. Then click the OK button.
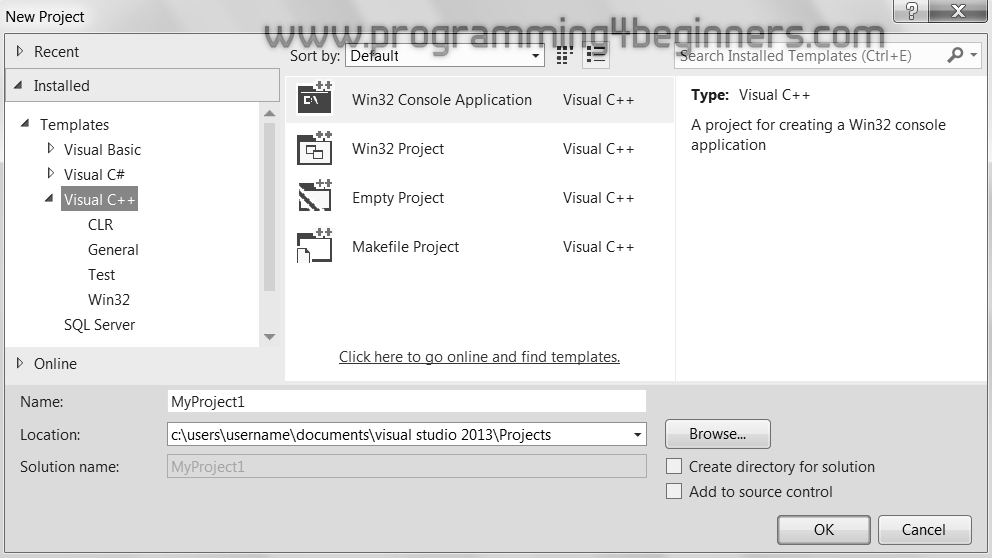
In the following dialogue, first click on Application Settings, then select the Empty project option. You can disable the Security Development Lifecycle (SDL) checks. Then click on the Finish button.
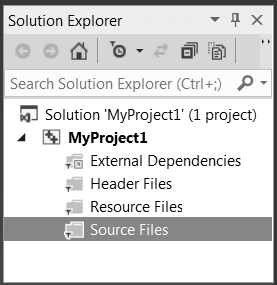
This will create the new project, and your IDE will then open it. On the right side of the IDE, the Solution Explorer window will be displayed showing the name of your project.
Now, you must add a file which will contain the source code for the project. In the Solution Explorer window, right-click on the Source Files map and select Add -> New Item.
In Code::Blocks IDE, the source code file main.cpp will be added by default. To open the file in the editor, click on Sources folder, then double-click on main.cpp file.
The dialogue will be presented in which you
just need to verify that the C++ File (.cpp)
is selected, and to type in the name of the file.
We suggest the name main.cpp.
Then click on the Add button.
The IDE will then open the file you have just created in the source code editor. There you can type in the text of your program, the program's source code.